Free Online Image Converter
Convert PNG, JPG, WEBP Online (Privacy First)
Advanced Image Converter
Convert, resize & compress images instantly (no upload).
Drag & Drop Image or Click
The Complete Guide to Fast, Secure & Private Image Conversion in 2026
Your images reveal more than you think. Learn why format choice shapes your website’s speed, your audience’s trust, and your personal privacy — and how to convert images the right way.
Introducing Our Free Online Image Converter
Every image you post online carries invisible weight — not just in pixels, but in file format, compression algorithm, and metadata. Choose the wrong format and your website crawls; upload to the wrong tool and your private photos sit on a stranger’s server indefinitely. This guide cuts through the confusion to give you a clear, complete picture of image conversion in 2026.
Whether you are a seasoned web developer chasing perfect Core Web Vitals scores, a small business owner trying to speed up your Shopify store, or simply someone who wants to send a photo without risking their privacy, the principles here apply equally. And at the center of it all is one deceptively simple question: what format should my image actually be?
Why Image Format Is One of the Most Underrated Decisions in Web Design
Most people treat image format as a throwaway technical detail — the three-letter extension tacked onto a filename before the upload button is clicked. In reality, format choice is a compounding decision that affects page load time, SEO rankings, visual fidelity, transparency support, and even whether your design holds up in an email client or on a five-year-old Android phone.
Google’s Core Web Vitals framework, now a confirmed ranking factor in search, measures Largest Contentful Paint (LCP) — how quickly the main visual content of a page loads. In the vast majority of cases on image-heavy websites, that “largest element” is an image. A single unoptimised photograph in the wrong format can push your LCP score from “Good” into “Needs Improvement,” costing you both rankings and the attention of users who abandon slow pages within three seconds.
The economics are straightforward: format is free to change, and the performance gains are immediate. No server upgrade, no CDN contract, no developer sprint — just a conversion and a re-upload.
JPG, PNG, and WEBP: An Honest Breakdown
There are dozens of image formats in active use, but for the modern web, three dominate. Understanding each one’s trade-offs is the foundation of every smart conversion decision.
Format 01
JPG / JPEG
The workhorse of digital photography since 1992. Uses lossy compression to achieve small file sizes by permanently discarding image data on each save.
✓ Excellent for photographs
✓ Very small file sizes
✓ Universal browser support
✗ No transparency support
✗ Quality degrades each re-save
Format 02
PNG
The standard for logos, icons, and any image requiring a transparent or semi-transparent background. Uses lossless compression — no pixel data is ever discarded.
✓ Lossless — no quality loss
✓ Full transparency (alpha channel)
✓ Sharp edges on text and graphics
✗ Large file sizes
✗ Overkill for photographs
Format 03
WEBP
Google’s 2010 format designed specifically for the web. Combines the best of both worlds — lossy and lossless compression, plus full transparency support.
✓ 25–34% smaller than JPG
✓ Supports transparency like PNG
✓ Near-universal browser support
✗ Minor compatibility gaps pre-2020
✗ Not always ideal for print
Developed by Google, WEBP is the future of the web. It provides smaller file sizes than JPG with better quality. According to Google Developers, WEBP images are significantly smaller than PNGs and JPGs, making it the best choice for SEO.
When JPG is the right call
JPG remains the sensible choice for photographs shared on social media, embedded in emails, or displayed as editorial imagery in blog posts. Its compression algorithm is optimised for the continuous tonal gradations of real-world photography — skin, sky, foliage, fabric. At a quality setting of around 85–92%, the human eye cannot distinguish a well-compressed JPG from a lossless original at normal viewing distances. For Instagram posts, Facebook covers, and email headers, JPG is both practical and perfectly sufficient.
Where JPG falls apart is in anything with a transparent background or sharp geometric edges. Company logos, software UI screenshots, and text-over-image graphics will show blocky compression artefacts around their edges — the infamous “JPG halo.” For these use cases, never use JPG.
When PNG is the right call
PNG is non-negotiable for any image element that needs to sit cleanly against multiple background colours — logos, icons, stickers, overlays, watermarks, and anything involving text or fine linework. Because PNG uses lossless compression, it is also the archival choice for master copies of images you intend to edit repeatedly. Re-saving a JPG erodes its quality with each pass; a PNG is identical to its source no matter how many times it is opened and saved.
The trade-off is file size. A PNG version of a complex photograph will often be four to eight times larger than the equivalent JPG — sometimes more. This is why PNGs are largely absent from photography-heavy pages and reserved for the precise use cases where their lossless quality and transparency support are genuinely required.
When WEBP is the right call
For almost everything else — and increasingly, for everything — WEBP is the answer. Developed by Google and first released in 2010, WEBP has achieved near-universal browser support as of 2021, meaning the old excuse of “some users won’t see it” no longer holds for the overwhelming majority of web traffic. It delivers files roughly 25–34% smaller than comparable JPGs without perceptible quality loss, and it handles transparency just as elegantly as PNG. If your website runs on WordPress 5.8 or later, Shopify, Squarespace, or any modern CMS, WEBP is natively supported on both the upload and delivery side.
“By converting five 2MB PNG images on a single homepage to WEBP, you can reduce the total image payload from 10MB to under 1MB — potentially cutting load time by several seconds on a mobile connection.”
The Privacy Problem with Traditional Online Converters
Here is something most online image converter tools would rather you did not think about: when you upload a file to convert it, that file travels over the internet to a server owned by a company you know nothing about, is processed on hardware you cannot inspect, and — in most cases — is stored for an unspecified period governed by a privacy policy you almost certainly did not read.
For a screenshot of a public website, this probably does not matter. But consider what people actually convert on a regular basis: scans of passports and driving licences, photos of credit cards and bank statements, internal business presentations saved as images, medical documents and prescriptions, personal photographs. Every one of these files — uploaded to a free online converter — becomes a potential liability.
How browser-based conversion eliminates the risk entirely
The most secure image converter is one that processes your file without ever sending it anywhere. This is not a theoretical concept — it is precisely what the HTML5 Canvas API enables. When a conversion tool is built on browser-side JavaScript rather than server-side PHP or Python, the entire conversion pipeline runs inside your own device’s memory. The file is read locally, drawn onto an invisible canvas element in your browser’s rendering engine, and re-encoded into the target format — all without a single byte leaving your machine.
The practical consequence is absolute: a company running a browser-based converter cannot see your files. Not because they promise not to look, but because the architecture makes it technically impossible. For corporate environments handling sensitive visual assets, this distinction is not a marketing preference — it is a security requirement.
Privacy checklist — what to look for
- No upload progress bar. If the tool shows a server upload percentage, your file is leaving your device.
- Instant conversion. Browser-based tools convert in milliseconds regardless of file size; server-based tools take seconds or minutes depending on queue and bandwidth.
- Works offline. A truly local tool should function with no internet connection after the page loads.
- Open source or auditable. The best privacy-first tools publish their source code for independent review.
How to Convert an Image in Three Steps
The mechanics of a well-designed image converter should require almost no explanation — but understanding why each step exists makes you a more confident user.
1. Select your source image
Click the file picker and choose any image from your device — desktop, laptop, tablet, or phone camera roll. Most modern converters accept JPG, PNG, WEBP, GIF, BMP, TIFF, and SVG as input. The tool reads the file locally and displays a preview. Nothing is uploaded anywhere.
2. Choose your target format
Select whether you want JPG, PNG, or WEBP from the dropdown. If you are converting to JPG or WEBP, you may also be able to adjust the quality level — a setting of 90–92% is the practical sweet spot where file size savings are significant and quality loss is imperceptible to the human eye.
3. Convert and download
The conversion happens instantly in your browser’s memory using the Canvas API. A preview of the converted image appears immediately. Click download to save the new file — and before you do, rename it descriptively (e.g., handmade-ceramic-mug-blue.webp rather than IMG_4831.webp). That filename will matter for SEO.
Image Optimisation and SEO: Why They Are Inseparable
Search engine optimisation has always been partly about technical performance, but since Google’s 2021 Page Experience update made Core Web Vitals a ranking signal, image optimisation moved from “best practice” to “competitive necessity.” Understanding the connection between image format, file size, and search rankings is no longer optional for anyone managing a commercial website.
The cascading effect of image weight on page speed
A typical product page on an e-commerce site contains between four and twelve images. If each of those images is a PNG exported from a design tool at full resolution — as is surprisingly common — the combined image payload can easily reach 15–25MB. On a fast broadband connection this is merely slow; on a 4G mobile connection in a signal-patchy area, it is effectively invisible. The user bounces before the images finish loading, and Google’s crawler notes the poor LCP score.
Converting those images to WEBP at a quality setting of 85% and resizing them to no wider than 1,920 pixels (the maximum useful display width on a 1080p monitor) will routinely reduce that payload to under 2MB — a reduction of 85–90% with no perceptible visual difference to the end user. The resulting improvement to LCP scores, and by extension to Google PageSpeed Insights ratings, can be dramatic.
Naming your images for discovery
Image filename optimisation is one of the easiest, most frequently overlooked SEO improvements available. Google’s image crawler reads filenames as a contextual signal about what an image depicts. A filename of product_hero_handthrown-terracotta-planter_outdoor.webp communicates meaningful information; DSC_00472.webp communicates nothing.
The discipline required is minimal: simply rename your file to a short, hyphen-separated, lowercase description of its content before downloading from the converter. Include your primary keyword where it fits naturally. Do not keyword-stuff or invent descriptions that do not match the actual image — Google’s Vision AI is increasingly capable of detecting mismatches between image content and surrounding text signals, including filenames.
SEO optimisation checklist — before and after conversion
- Convert to WEBP as the default format for all web images wherever browser support permits.
- Resize to 1,920px maximum width before converting. High-resolution source files waste bandwidth on screens that cannot display the extra pixels.
- Set quality to 85–92% for lossy formats. Below 80% and compression artefacts become noticeable in photographs; above 92% and file size savings diminish sharply.
- Rename descriptively using hyphens, lowercase, and your primary keyword before downloading.
- Add alt text after upload — this cannot be done in a converter, but it is the most important image SEO action you can take in your CMS.
- Use lazy loading (
loading="lazy"attribute in HTML) for images below the fold
The Technical Foundation: How Browser-Based Conversion Works
Under the hood — the HTML5 Canvas API
When you select a file in a browser-based converter, the JavaScript FileReader API reads it as a binary data stream directly from your device’s storage — never from a server. That data is decoded into an HTMLImageElement object held in browser memory.
An invisible <canvas> element is created at the same dimensions as the source image. The drawImage() method paints the decoded image data onto this canvas in one operation.
Finally, canvas.toDataURL('image/webp', 0.92) — or the equivalent JPG or PNG call — re-encodes the canvas contents into the target format using the browser’s own native codecs. The result is a base64-encoded data URL that can be converted into a downloadable Blob and saved to disk.
The entire sequence executes in milliseconds on any modern device and requires no server-side language (no PHP, no Python, no Node.js). Your file exists only in RAM for the duration of the operation and is never written to disk outside your own machine.
Frequently Asked Questions
Is a free image converter really unlimited and free?
How much quality do I actually lose converting PNG to JPG?
Can I convert a transparent PNG to JPG and keep the transparency?
Does image conversion work on mobile devices?
What is the ideal quality setting for WEBP conversion?
Will WEBP images affect my Google PageSpeed score?
A Final Word on Speed, Privacy, and the Right Tool for the Job
Image conversion is not a glamorous task. It sits in the background of a hundred workflows — the last step before a blog post goes live, the quick fix before a presentation gets sent, the compression run before a portfolio site is deployed. But the cumulative impact of doing it well is significant: faster websites, higher search rankings, smaller email attachments, and the quiet confidence that your private files stayed private.
The emergence of browser-based, privacy-first conversion tools has removed every previous reason to use server-based alternatives for routine image tasks. There is no longer a trade-off between convenience and security — the convenient choice is now also the secure one. And in a landscape where personal data is treated as a commodity by default, tools that make it technically impossible to collect your data deserve recognition for the architectural choice they have made.
Choose your format deliberately. Compress thoughtfully. Name your files with intention. And use a tool that respects the simple fact that your images are yours.
Ready to convert your first image?
No uploads. No accounts. No limits. Your file stays on your device — always.
Latest Posts
Free Image to WebP Converter Online: Convert JPG, PNG, GIF to WebP Instantly for Faster Websites in 2026
In today’s digital landscape, image optimization is no longer optional...
Read More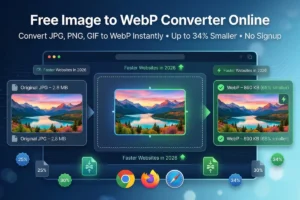
Free Online Word Counter Tool for SEO: Count Words, Track Characters & Time Your Content
If you have ever published a blog post, written a...
Read More
Free Keyword Idea Generator for Bloggers: The Ultimate 2026 Playbook
Every successful blog post starts with a single, powerful keyword....
Read More
How to Use Vibe Coding for Non-Technical Marketers: A Complete Guide
The gap between having a brilliant marketing idea and actually...
Read More
How to Make Money Online Using Mobile Phone Only for Beginners: The Ultimate 2026 Guide
How to make money online using mobile phone only for...
Read More
Website Profit Multiples in 2026: The Seller’s Secret Guide
In 2026, a standard content blog typically sells for 35x...
Read More
How to Check Website Worth for Free: A Complete Guide for 2026
If you have spent months or years building a blog,...
Read More